|
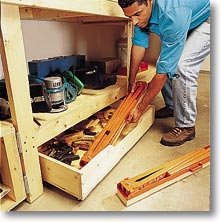
These simple-to-build drawers take
advantage of space that's normally wasted. Plywood bases, 1x6 sides
and wheels eliminate the tricky steps that go into most drawer
construction. The parallel, fixed wheels make the drawer roll
smoothly on the garage floor.

| |
GLUE
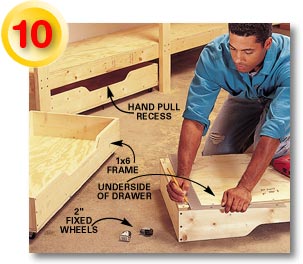
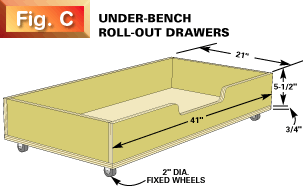
AND SCREW the drawers according to Fig. C and use a
carpenter's square to align fixed wheel positions on the
underside of the drawers to ensure that they're parallel. Then
the drawers will track properly during operation.
|

|

|


|
|


The 2-ft. wide bench (generally cluttered with
materials and tools) doesn't give much space for assembly work. But
when you add the flip-up assembly table, you'll have room to put
together all but the largest projects. Best of all, it folds down
out of the way when it comes time to put the car away.
Double-layered glued and screwed 3/4-in. plywood and 2x4 support
legs make it sturdy enough to support even the heaviest project. A
1x4 edge band glued to the three exposed sides helps prevent warpage
and keeps your fingers splinter-free.

|

|

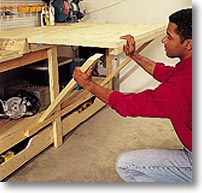
It's best if you can access the flip-up workbench from all three
sides. We couldn't do that with our bench, but if you can keep the
end of your bench at least 3 ft. from the rear garage wall, so much
the better.

|
|
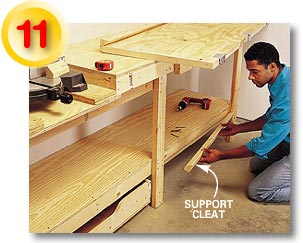
| |
GLUE
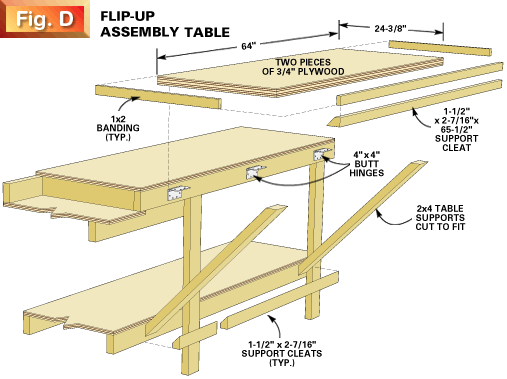
AND SCREW the table together, using Fig. D as a guide.
Mount three evenly spaced 3-in. butt hinges on the underside
of the tabletop. Rip a 66-in. long 2x4 down the center at a
45-degree bevel to create two matching halves. Cut these
support cleats to length and screw them in place with 3-in.
screws as shown in Fig. D.
|

|
|
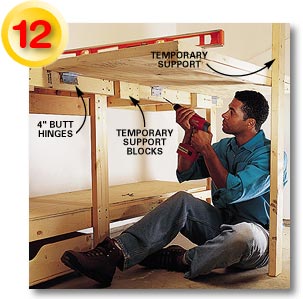
| |
SCREW two temporary 6-in. support blocks 1-1/2
in. from the top of the workbench to support the flip-up
worktable while attaching the hinges. Temporarily screw the
table to the blocks and to a support post on the front of the
table. Then screw in the bottom hinge leaves. Check the table
to confirm that it's perfectly level and cut the 45-degree
table support legs to fit.
|

|


